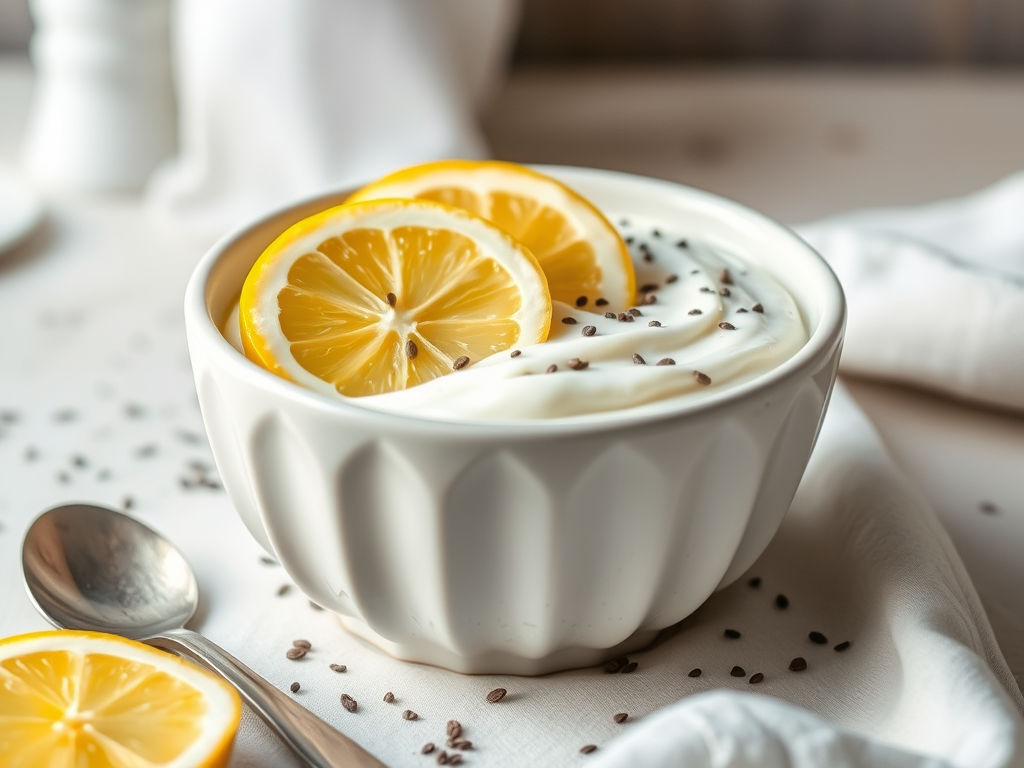
Posted in essential oils, Recipes

Nopal Street Tacos

Crispy Nopal Street Tacos with Green Chili Rice & Black Bean Pico

Growing up in Phoenix, having nopal (cactus paddles) and prickly pear fruit in the grocery store was completely normal. It was just part of life.

After moving away, I realized not every grocery store — or restaurant — carries nopal. So, when I spotted fresh cactus paddles at one of my favorite stores recently, I was thrilled. Of course, I bought them… and today’s recipe was born.

These crispy nopal street tacos are not only delicious, but they’re also incredibly nourishing. I paired them with green chili rice and a fresh black bean pico de gallo for a simple, plant-based meal that feels both comforting and vibrant

Nopal (also called nopales) is a traditional staple in Mexican cuisine and has been used for generations for its health benefits.

Nutrition highlights (1 cup cooked nopal, approx.):

  • ~14–20 calories
  • 2g fiber
  • Vitamin C
  • Magnesium
  • Calcium
  • Antioxidants (betalains)

Benefits:

  • Supports blood sugar balance
  • High in fiber for gut health
  • Naturally anti-inflammatory
  • Hydrating and mineral-rich
  • Low calorie but satisfying

It’s a beautiful addition to a whole-food, plant lifestyle.


How to Prepare Fresh Nopal

If you purchased nopal in a jar, you can skip the cleaning and boiling steps and jump ahead to the breading section.

Step 1: Remove the Thorns

Using a sharp knife, carefully run the blade against the surface of the paddle to remove the thorns. Work slowly and go against the direction of the spines. Trim off the base (“butt”) of the paddle and remove a very thin edge along the sides.

Step 2: Wash

Place the cleaned paddles in a bowl of water to rinse off any remaining needles and debris.

Step 3: Slice

Remove from water and slice into strips or bite-size pieces. Keep in mind: smaller pieces cook faster.

Step 4: Boil Until Tender

In a large pot:

  • 1 diced onion
  • Generous pinch of salt
  • 2-3 drops of cilantro pure essential oil
  • Enough water to fully cover cactus

Bring to a gentle boil and cook 15–20 minutes, until tender. Drain well and lay on a towel or parchment to remove excess moisture.

(If using jarred nopal, simply drain and pat dry.)

Crispy Nopal Taco Filling

You’ll Need:

  • Cooked nopal
  • 2 eggs
  • Hot sauce (I love Cholula)
  • Taco seasoning
  • Panko or seasoned breadcrumbs even corn meal or flour will work
  • Olive oil spray

Directions:

  1. In one bowl, whisk eggs with hot sauce to your preferred heat level.
  2. In a separate bag or bowl, combine breadcrumbs and taco seasoning.
  3. Dip cooked nopal into egg mixture.
  4. Transfer to breadcrumb mixture and shake to coat (like a “shake and bake” method).
  5. Place on parchment-lined baking sheet.
  6. Spray lightly with olive oil, flip, and spray the other side.
  7. Bake at 500°F for 7–10 minutes, until golden and crispy.

Cooking time will vary based on how thick you sliced the nopal.

Black Bean Pico De Gallo (Fresh & Protein-Rich)

Ingredients:

  • 1 can black beans, drained and rinsed
  • Handful cherry tomatoes, diced
  • Small onion, diced
  • ½ cup corn (fresh or thawed frozen)
  • 1 small orange bell pepper, diced
  • ¼ cup canned green chiles
  • 4 drops of lime pure essential oil
  • Cumin
  • Garlic paste
  • Salt
  • Hot sauce to taste

Stir together and let sit for flavors to blend. I made this in the morning just so it had a chance to merry, but you can do it as your nopal bake.

Nutrition boost:

  • Plant protein
  • Fiber
  • Iron
  • Folate
  • Antioxidants

This adds texture, color, and satisfying heartiness to your tacos

Assemble Your Tacos

Warm corn tortillas.
Add crispy nopal.
Top generously with black bean pico.

Optional additions:

  • Avocado slices
  • Fresh cilantro
  • Cotija cheese
  • Greek yogurt or crema
  • Squeeze of lime

Why I Love This Meal

This recipe is:

  • Budget friendly
  • Plant-forward
  • High fiber
  • Blood sugar supportive (hello great for menopause!)
  • Naturally gluten-free (use GF breadcrumbs if needed)

It’s a beautiful reminder that traditional foods often carry powerful nourishment — and a little piece of home. If you would like the dummy easy green chili rice recipe, just drop in the comments below that you would and I’ll gladly share it.

Essential Oil Safety Disclaimer

If choosing to use essential oils in recipes, please use extreme caution. Not all essential oils are safe for internal use, and many are highly concentrated.

Only use oils that are:

  • Specifically labeled for internal culinary use
  • From a reputable company that provides GC/MS testing
  • Used in very small, properly diluted amounts

Essential oils are significantly more potent than dried or fresh herbs. In most cases, fresh lime juice, zest, cilantro, or other whole-food ingredients can safely provide the same flavor.

Always consult a qualified healthcare professional if you have medical conditions, are pregnant or nursing, or are serving food to children.

When in doubt, leave it out — whole food ingredients are always the safest choice.

Posted in essential oils, Health and beauty, Recipes

DIY Homemade Baby Wipes


DIY Homemade Baby Wipes — Simple, Natural, and Budget-Friendly

After getting such a great response to my cleaning bombs last month, I thought it was the perfect time to bring back an old favorite — with a little update!

Now, I usually avoid using paper towels, napkins, or other disposable wipes whenever I can. But when it comes to baby wipes, I draw the line at cloth. I wanted something convenient but also gentle, safe, and chemical-free.

So, I decided to make my own wipes. Because lets face it we all could use these, they’re not just for babies. I know I need these especially when I have to do my yearly dreaded prep for my colonoscopy, yes I said yearly! Thanks to my Lynch Syndrom and being a cancer survivor that fun is yearly but better safe than sorry, right? So, when I say these not only save money, these wipes have to be free of any and all cancer causing ingredients. I need to know exactly what’s going on my skin — no hidden chemicals, fragrances, or irritants.  And the best part? They’re just as effective as the store-bought ones. Believe me these wipes hold up!

Here’s what you’ll need:

Ingredients:
✨ 1 Plastic coffee container (29 oz) or round glass
✨ 1 Roll of paper towels
✨ 2 tablespoons coconut oil
✨ 2 tablespoons baby wash (or a gentle, toxin-free soap)
✨ 2 tablespoons tea tree oil
✨ 2 cups hot water

Instructions:

  1. Cut the roll of paper towels in half so it fits into your coffee container.

  2. In a bowl, mix the hot water, coconut oil, baby wash, and tea tree oil.

  3. Pour the mixture over the paper towels inside the container.

  4. Let it sit for 3–4 minutes to fully absorb.

  5. Remove the cardboard tube from the center of the roll.

  6. Optional: Cut an “X” in the center of the container lid and pull the wipes through for easy access.

That’s it! Simple, natural, and so effective.

Give it a try — your wallet and yours or little one’s skin will thank you. 💛

Posted in essential oils, Green Cleaning Tips, Recipes

Toilet Bombs

I know I usually offer a tasty recipe on a Monday, but today I thought I would bring back an old cleaning recipe I blogged about in 2016.  With summer in full swing, I figured it was a good time to refresh our memories on this all-natural household cleaner, especially since many of us have our homes closed up using air conditioners. Plus, I miss giving green tips and will bring that back. I’d like to hear in the comments if this kind of content will be helpful.

This cleaning recipe is not only effective, but also environmentally friendly and inexpensive. It uses simple ingredients that you probably already have in your pantry or can get easily enough at the store. And the best part? It works for most toilets, even sinks or bathtubs, making it a great versatile solution for your cleaning needs.

So what do you need for this DIY cleaner? Citric acid, baking soda, water, and essential oils of your choice (optional for scent, but it is the best part). Did you realize you had amazing options right inside your house?

These homemade toilet cleaning tablets offer a simple, eco-friendly solution to replace harsh chemical cleaners—and they’re incredibly easy to make!

All you need are a few common household ingredients and an ice cube tray. So say goodbye to those harsh chemicals and give these DIY toilet cleaning tablets a try.

Your toilet and the environment will thank you.

Baking soda and citric acid are natural, effective cleaning agents that tackle stains and odors in your toilet without relying on harsh chemicals. When combined with essential oils, these ingredients create a powerful, eco-friendly toilet cleaner that not only leaves your bathroom spotless, but also fills it with a refreshing, pleasant scent.

To start, gather the following ingredients:

– Baking soda

– Citric acid

– Lemon essential oil

– Water

Instructions:

1. In a mixing bowl, combine 1 cup of baking soda with 1/4 cup of citric acid.

2. Add 15-25 drops of lemon essential oil and mix well. (or any sent you prefer)

3. Slowly add water to the mixture until it forms a paste-like consistency.

4. Spoon the mixture into an ice cube tray, pressing down firmly to pack it in.

5. Let the tablets dry overnight or for at least 8 hours.

6. Once completely dry, pop out the tablets from the tray and store them in an airtight container.

That’s it! Your all-natural bathroom cleaning tablets are ready to use.

To use:

1. Drop one tablet into your toilet bowl and let it fizz up.

2. Scrub the bowl with a toilet brush and flush.

3. You can also use these tablets for other surfaces in your bathroom, such as sinks, tubs, and counters.

4. Simply drop a tablet onto the surface, let it sit for a few minutes, then wipe clean with a damp cloth.

Not only will these cleaning tablets leave your bathroom sparkling clean, but they will also leave behind a refreshing lemon scent. Plus, you can feel good knowing that you are using all-natural ingredients instead of harsh chemicals.

So next time you need some deep cleaning in your bathroom, give these DIY cleaning tablets a try. Your bathroom and the environment will thank you!

Posted in essential oils, Recipes

How to Make Green Chile Enchiladas That’ll Impress Every Food Lover You Know

Picture this—a dish so hearty, comforting, and packed with flavor that it becomes your go-to for Meatless Mondays (or any day, really). Enter green chili enchiladas, an absolute crowd-pleaser that checks all the boxes for foodies, vegetarians, and anyone who just loves a good plate of Mexican cuisine.

I get it—when you’re craving Mexican food, your mind might jump straight to tacos or nachos, but trust me, these green chili enchiladas deserve a spotlight on your dinner table. They’re easy to make, incredibly versatile, and oh-so-delicious. You can keep them vegetarian with black beans (my personal preference) or toss in shredded chicken if you’re feeding a meat-loving crowd.

And here’s where it gets even more exciting—the real star of this dish is the homemade green chili sauce. Sure, you could grab a jar from the store, but taking the time to whip up your own sauce? Totally worth it. The flavor, the aroma, the feeling of accomplishment—it’s next-level stuff.

Whether you’re cooking for yourself, some foodie friends, or the family who just wants a tasty meal, these enchiladas are a culinary hug you didn’t know you needed.

Green Chile Sauce Recipe (A Game Changer)

Let’s start with the green chili sauce. Making it from scratch might sound intimidating, but believe me, it’s easier (and WAY tastier) than you think. Plus, the kitchen’s going to smell divine.

Ingredients

  • 2 tablespoons oil
  • ½ cup onion, finely chopped
  • 1–2 garlic cloves, minced
  • 3 tablespoons Gary’s True Grit™ Einkorn Flour (or regular AP flour if that’s what you’ve got)
  • ¼ teaspoon cumin
  • 1½ cups vegetable broth
  • 1 cup Anaheim or Poblano chilies, roasted and peeled (or 1 cup canned diced green chilies, rinsed and drained)
  • ½ teaspoon salt
  • 1 medium jalapeno, finely diced (optional, for a nice kick)
  • 1 drop Black Pepper Vitality™ essential oil
  • 1 drop Oregano Vitality essential oil
  • 1 drop Lime Vitality essential oil
  • Salt to taste
  • ¼ cup cilantro, chopped

Instructions

  1. Heat oil in a medium saucepan over medium heat.
  2. Add onion and garlic; cover and cook until the onions are soft but not browned (about 5–6 minutes). Stir occasionally—this part is kind of therapeutic!
  3. Stir in the flour and cook for 2–3 minutes. It’ll clump—don’t panic, that’s totally normal.
  4. Slowly whisk in the broth to smooth out the lumps. Watch it go from clumpy to silky—so satisfying.
  5. Add the cumin, chilies, salt, and jalapeno (if you’re using it) and bring to a boil.
  6. Reduce heat to low and simmer for about 30 minutes, stirring occasionally. The sauce should coat your spoon, but still drip off—golden consistency unlocked!
  7. Remove from heat and stir in the Vitality oils. Feel free to taste and adjust the salt if needed.
  8. For a smoother sauce, blend it in a food processor or blender. Pro tip: Blending makes it feel extra fancy!

And voilà, you’ve got yourself the tastiest green chili sauce on the block.

Time to Assemble the Enchiladas

Got your sauce ready to go? Great! Here’s how to transform it into a plate of pure joy.

Ingredients for the Enchiladas

  • 1–2 cups black beans (or ½ pound shredded chicken if you’re going the meat route)
  • 8–10 white corn tortillas
  • 1 cup shredded cheese (your pick—cheddar, Monterey Jack, whatever floats your cheesy boat)
  • The green chili sauce you just made (you genius, you!)
  • Optional toppings: black olives, extra cheese, fresh cilantro

Instructions

  1. Preheat the oven to 350°F. It’s about to get seriously cozy in your kitchen.
  2. Spread a little less than half of your green chili sauce on the bottom of a 9×13 pan. This helps keep everything nice and juicy.
  3. Dip a tortilla in the sauce, fill it with black beans (or chicken), sprinkle a little cheese, roll it up, and place it seam-side down in the pan. Bonus points if you manage this without sneaking bites of the filling. Repeat with the remaining tortillas.
  4. Pour the rest of the sauce over your enchiladas, making sure every inch is covered. Sprinkle the top with more cheese, because… why not?
  5. Optional but highly recommended—add sliced black olives for a little extra flair.
  6. Bake for about 20 minutes, or until the cheese is bubbly and golden. Your kitchen is about to smell like a dream.

Serve Like a Pro

When they’re fresh out of the oven, sprinkle the enchiladas with chopped cilantro. It adds a pop of color and a hit of freshness that ties the whole dish together.

If you’re anything like me, you’ll end up making a plate, then going back for seconds. Or thirds. No judgment here.

Why These Green Chile Enchiladas are a Must-Try

  • Perfect for Meatless Mondays: Black beans make this veggie-friendly without sacrificing any of the hearty vibes.
  • Customizable: Got meat lovers? Throw in the shredded chicken. Want more heat? Add an extra jalapeno or a drizzle of hot sauce. The possibilities are endless.
  • Homemade Sauce = Next-Level Flavor: Seriously, it makes ALL the difference. Once you taste it, you’ll never go back to store-bought.

Final Thoughts

There you have it—an easy, flavorful Mexican-inspired dish that’s perfect for a cozy dinner at home or impressing guests. Whether you’re a committed vegetarian, an adventurous foodie, or just someone who loves cheese (hi, me too), these green chile enchiladas are bound to become a favorite.

Got your tortillas ready? Don’t forget to tag me on Instagram with your masterpiece! And if you’re feeling inspired to explore even more bold flavors, keep an eye on our recipe blog for future goodies.

Buen provecho! 🌿

Posted in essential oils, Green Cleaning Tips, Recipes

Freshen Up Your Bed with DIY Mattress Spray

IMG_20180327_151330691

Hey there, eco-conscious friends and allergy sufferers! 🌿 (and those who sleep with their fur babies)

I was making my bed this morning and thought, since I use this mattress spray daily, why not share this great tip again for those who might have missed it?

Why You Need This Mattress Spray

Sleeping with my little fur baby means my bed can get a little dirty, no matter how hard I try to keep her clean. If you’ve got pets (or even if you don’t), you know the struggle. But don’t worry; I’ve got a simple solution that not only keeps your bed clean but also smelling divine.

Every day when I make my bed, I take a few extra minutes to spray my sheets with this fantastic DIY mattress spray. After spraying, I quickly dust off any visible fur with my hand or a dry cloth. The spray dries in minutes, and then I make my bed as usual. The best part? I get to sleep in a fresh, clean, and wonderfully smelling bed every night. Plus, it keeps the spiders at bay!

Nothing ruins a good night’s sleep like the thought of dust mites or spiders sharing your bed. Here’s how to make your own mattress spray and ensure a peaceful, clean sleeping environment.

DIY Mattress Spray Recipe

Ingredients:

  • 3 Drops of Eucalyptus Essential Oil
  • 3 Drops of Lemon Essential Oil
  • 3 Drops of Lavender Essential Oil
  • 3 Drops of Melaleuca (Tea Tree) Essential Oil
  • 3 Drops of Peppermint Essential Oil
  • 1/2 Bottle of Witch Hazel
  • 1/2 Cup Water
  • 2 oz Glass Spray Bottle

Instructions:

  1. Mix the Ingredients:
    • Combine the essential oils, witch hazel, and water in a small bowl (or if you are like me just mix it in a glass spray bottle so you don’t have to worry about transferring to a bottle.)

    1. Transfer to Spray Bottle:
    • Carefully pour the mixture into a 2 oz glass spray bottle.
    1. Shake Well:
    • Give the bottle a good shake to blend all the ingredients thoroughly.
    1. Spray and Enjoy:
    • Lightly spray your mattress and sheets. Allow a few minutes for it to dry before making your bed as usual. Enjoy the lovely aroma!

    Benefits of Using This Mattress Spray

    • Eco-Friendly: Made from natural ingredients, it’s safe for you, your pets, and the planet.
    • Allergen Control: Essential oils like eucalyptus and tea tree help reduce allergens and dust mites.
    • Pleasant Aroma: Lavender and lemon oils provide a soothing, fresh scent.
    • Insect Repellent: Peppermint and eucalyptus oils naturally repel spiders and other insects.

    Conclusion

    Keeping your bed clean has never been easier or more pleasant. With just a few ingredients, you can create a mattress spray that ensures a fresh and inviting sleeping environment every night. Try it out and experience the difference for yourself!

    Feel free to share your experiences or modifications in the comments below. Sweet dreams! 🌙✨

Posted in essential oils, Health and beauty, Recipes

Golden Milk

I have made and even shared my favorite turmeric latte/golden milk (see earlier post from 1/25/21). So, when I came across a great recipe, I had to share it and yes, I was given permission to share.

Golden milk is a popular drink that has been gaining recognition in recent years for its health benefits. This ancient beverage, also known as turmeric milk, has been used for centuries in Ayurvedic medicine and is now being embraced by holistic health practitioners and wellness enthusiasts alike.

So what exactly is golden milk? It is a warm and comforting drink made with dairy or non-dairy milk, turmeric, ginger, black pepper, and other spices. The star ingredient of this drink is turmeric, which gives it its vibrant golden color. Turmeric contains a compound called curcumin, which has powerful anti-inflammatory properties. This makes golden milk an excellent remedy for reducing inflammation in the body and relieving symptoms of conditions such as arthritis and irritable bowel syndrome.

Want to give it a try?


Golden milk:

By : Valentina Ramire

RECIPE

1/2 cup almond milk

1/2 cup coconut milk

1 capsule of curcuma powder

4 drops of curcuma essential oil

3 drops of black pepper essential oil

3 drops of essential oil of ginger

1/4 tbsp vanilla

1/4 tbsp honey

Put in a pot to boil, serve and put cinnamon on top.

Foot Note: All rights for this recipe are Valentina Ramirez (a wellness advocate with doTerra). The information regarding what golden milk is and its benefits are mine, but she is the genius behind this great recipe.

Posted in essential oils, Recipes

Basil-Infused Pasta Primavera

I’m sure if you have read any of my blog you realize I have a love for pasta and enjoy making up recipes that would probably be laughed at by anyone that does it well, maybe I should leave it up to the experts but I can’t help myself with trying new things or fully embracing other peoples recipes that evolve pasta.

I may have a carb addiction or maybe I should just move to a country where I fit in with my love of all things pasta who knows but todays recipe is from a great cookbook “The Essential DIY Recipes of Essential Cooking” by Essential Educators. This is a great book if you want to try using essential oils in your cooking. I’m not going to get into the debate of essential oils and ingesting them but I would love to share some benefits of basil and how in essential oil it can help. A big tip when cooking with essential oil, always, always make sure the essential oil is pure, know where they get the oil from and a little goes a long way.

In todays recipe it uses not only the essential oil but fresh so you get benefits from both.

Basil’s name is derived from “basileum” the Greek name for king and the uses can vary from the Italian women wearing basil to attract possible suitors or the Hindu people put basil sprigs on the chest of their dead to protect them from evil spirits. While in the 16th century powdered basil leaves were inhaled to treat migraines and chest infections. The medical properties are amazing, it is a powerful antispasmodic (an agent to suppresses muscle spasms) , antibacterial (and who doesn’t need that) plus it can be used on insect bits ( hello summers coming)…it is so amazing such a good tasting herb that is widely used can be so helpful. You can even use it aromatically to help fight mental fatigue and yes, defusing it really helps I have noticed it is pretty fast acting too.

This recipe is quick and with summer around the corner with all the benefits of basil its one I couldn’t help but share, I hope you like it and please let me know if you made it.

Basil-infused pasta primavera:

1lb. of Farfalle or pasta of your choice

4-6 drops Basil essential oil ( I only used 4 because a little goes a LONG way)

2 cups Fresh Broccoli Florets

1 medium Red Onion, diced

3 Tablespoon Olive Oil

1 cup Fresh Spinach, coarsely chopped

1 cup Cherry Tomatoes, quartered

Salt and Pepper to taste

Lemon Juice per taste

Grated Parmesan cheese for topping

2 Tablespoon minced fresh Basil for topping

Boil water for pasta. Add 4-6 drops of basil essential oil to the water. Cook pasta according to package instructions. Drain, rinse, and set aside.

In a large skillet over medium-high heat, sauté broccoli until just tender, about 7-10 minutes.

Combine pasta, broccoli, spinach, and cherry tomatoes in a serving bowl. Season with salt and pepper to taste.

Squirt the pasta primavera with lemon juice to taste, and then top with grated parmesan cheese and minced fresh basil.

Serve immediately and enjoy!

(Thanks to Essential oils pocket reference by Life Science. I use them so often but need to give a shout out, its such a helpful book if you want to know the benefits of essential oils.)

Posted in essential oils, Health and beauty

The Impact of Menopause on Brain Fog: A Guide for Family Members

Photo by Thomas P on Pexels.com

I have been thinking about how every woman will go through menopause but up until 1993 the medical community wasn’t even studding menopause on actual women! Yes! Can you believe that and as crazy as that is it’s a sad fact, no wonder, we as women are left wondering what is going on. In a (very) small way people are starting to talk about the dreaded M word. So, today’s post I thought I would give just facts to help us women and all those that love us understand what is going on. I decided to start with just one of the many things that happen as we age as much as I love the fog, I would gladly do without it in my brain because wow, that brain fog is rough! I know you’d probably agree the struggle is real and our poor family/friends!

Introduction

Menopause, a natural biological process that marks the end of a woman’s reproductive years, is often associated with a variety of physical and emotional changes. However, one aspect often overlooked is its impact on cognitive function. It’s not uncommon for women during menopause to experience moments of forgetfulness or a sense of mental cloudiness, often referred to as “brain fog.” This blog post aims to shed light on this phenomenon and provide guidance on how family members can support their loved ones during this phase.

Understanding Brain Fog

Brain fog, a term used to describe feelings of confusion, forgetfulness, and lack of focus or mental clarity, is a common but lesser-known symptom of menopause. It’s not a medical condition in itself but rather a symptom of underlying issues, often hormonal in nature. Women experiencing brain fog might forget names or appointments, have trouble remembering common words, or feel mentally “sluggish.”

Causes of Brain Fog in Menopause

Brain fog during menopause is primarily linked to three factors: hormonal changes, sleep disturbances, and stress or anxiety.

Hormonal Changes

Estrogen, a hormone that plays a significant role in cognitive function, decreases during menopause. This decline can affect memory, attention, and cognitive skills, leading to instances of brain fog.

Sleep Disturbances

Many menopausal women struggle with sleep issues, including insomnia or sleep apnea. Lack of quality sleep can result in daytime fatigue and concentration problems, exacerbating brain fog symptoms.

Stress and Anxiety

Menopause can trigger mood changes and increased anxiety, which can contribute to cognitive difficulties. High-stress levels can hinder focus and memory, adding to the feeling of brain fog.

Effects on Quality of Life

The impact of brain fog goes beyond mere forgetfulness. It can affect a woman’s daily activities, performance at work, and ability to maintain relationships. Moreover, the frustration of not being able to remember or think clearly can lead to emotional distress, lowering overall well-being.

Supporting Women with Brain Fog

As a family member, your understanding, empathy, and support can make a world of difference to a woman dealing with menopausal brain fog. Here are some ways you can help.

Open Communication and Empathy

Talk openly about the changes your loved one is experiencing. Validate her feelings and reassure her that it’s okay to ask for help when she needs it.

Encouraging Self-Care and Stress Management

Encourage your loved one to adopt a healthy lifestyle, including regular exercise, a balanced diet, and proper sleep. Techniques like yoga or meditation can help manage stress levels.

Recommending Supplements and Lifestyle Changes

Specific supplements, like Omega-3 fatty acids, B-vitamins, or phytoestrogens (if safe to do so), can potentially aid cognitive function. Even different essential oils help. It’s always best to consult with a healthcare provider before starting any new supplement regimen.(Even over the counter “natural” supplements)

Conclusion

Menopause is a significant life transition, and the journey can be challenging for women experiencing symptoms like brain fog. As family members, the most important thing we can do is to provide support and understanding. Remember, every woman’s menopause journey is unique, and what works for one might not work for another. Always encourage your loved one to discuss any symptoms or concerns with her healthcare provider. By understanding and addressing these menopausal changes, we can help our loved ones navigate this phase with grace and confidence.

Posted in essential oils, Recipes

Coco/Peppermint Fudgsicles

I was reading Young Livings recipes on cooking with essential oils and found this great recipe. The only thing I changed was I used raw honey but they turned out wonderful and on this downward stretch of summer with temps still staying pretty hot these are the perfect thing to cool you down.

So easy and things most of us have on hand, it only takes a little patience to wait as they set up.

IMG_20180817_121117133

Coco/Peppermint Fudgsicles
1 14 oz can of coconut milk

1/3 cup of Coco powder

2 Tablespoon of coconut oil

2 Tablespoon of raw honey

1-2 drops of peppermint essential oil.
Pour into molds, place in freezer for about 3 hours to set up.

IMG_20180818_182139412

Posted in essential oils, Health and beauty

Natural Nose Spay

Spring may not be in full bloom for a lot of us but those dreaded allergies will be coming soon enough, so because of this I thought I would share a different kind of recipe for you to try.

I worked for years in an ENT office. When I would give info to my patients, I found it was always the simple home remedies that usually worked best.

This is easy to make, does not take long and can be used when needed without side effects. (It’s always best to consult your physician before starting any home remedies)

Nasal spray bottle

Salt

Essential oils :

4 drops of Frankincense, 6 drops of Lavender, 3 drops of Melaleuca tea tree

distilled water

To make this put a pinch of salt in bottom of spray bottle add the essential oils let the oils absorb into the salt then add the distilled water to top of bottle.